
This post may contain affiliate links, which means we get commissions for purchases made through these links. Read more about our policy.
Buying equipment for your clients is one of the best—and most overlooked—business investments you can make as a personal trainer.
Yes, you’re spending money. But the returns vastly outweigh the cost.
You’re building client relationships and loyalty, boosting retention and referrals.
Plus, you’ll have another tool to use in your client’s programs, improving results.
Let’s take a look at how to do it right, plus five ideas for what to buy.
Buying exercise tools for your clients: How to do it right
Look for gear-gifting opportunities
Here are three you should not miss:
1. The equipment is part of your program
When Online Trainer Academy students Amanda Amaratunga and Cole Watt teamed up to launch an eight-week mini-band challenge, they sent a set of mini bands to every client who joined.
“It helps reinforce the good decision of signing up with you,” says Online Trainer Academy director Amber Reynolds.
2. You're helping a client overcome an obstacle
“If you know your client has a trip coming up and they're feeling anxious about staying on top of their workouts, send them a suspension trainer and update their program for their trip,” Reynolds suggests.
3. You want to reward your client
When a client hits a goal or renews their commitment with you, gifting an exercise tool can reinforce the behavior, Reynolds says.
Make the gift personal
“If you know their favorite color, choose a jump rope in that color,” Reynolds suggests.
If you can’t customize the product, customize the presentation.
If your client is a Wonder Woman fan, create a Wonder Woman–themed gift tag. “It amplifies the gift tenfold,” Reynolds says.
Budget for the expense
Reynolds recommends two options:
- Include the cost in your package price. (Don’t forget shipping.)
- Budget 5 to 10 percent of a client's package toward surprise-and-delight.
Consider your client’s goals and situation
Now all that’s left is to choose the right gear for your client.
That starts with understanding their goals and situation, Reynolds says. (Do they travel? How much space do they have to store and use exercise equipment?)
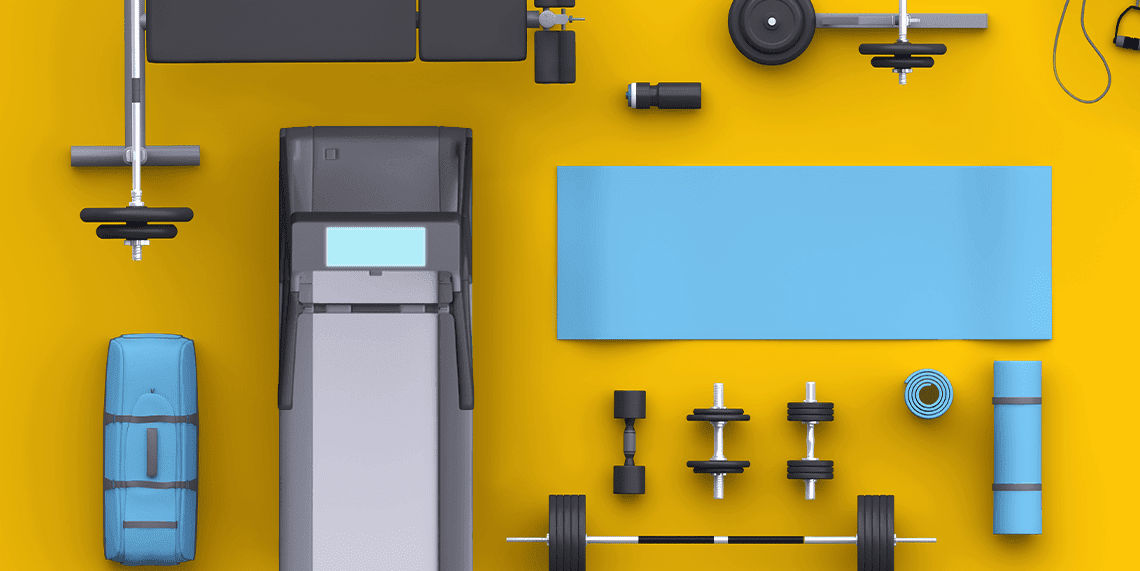
In this article, we’ll help you decide by exploring five must-have exercise tools:
Let’s get started.
Soft-tissue work
1. Foam roller
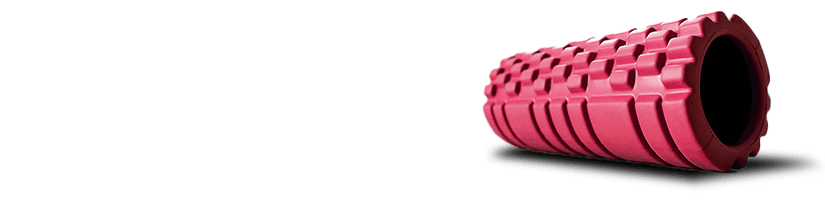
Every client should own a foam roller, says Logan Dube, a master instructor for TriggerPoint (maker of foam rollers).
Foam rolling gets the body ready to work out, says Dube. “It unlocks good movement—the key to achieving any goal.”
Related: Foam rolling can help relieve knee pain too.
It’s especially important for clients who spend all day sitting and stressing.
Stress signals the muscles to increase tone—partial muscle contraction.
Foam rolling stimulates the parasympathetic nervous system, signaling to the brain to “let go” of some of that tone and improving your range of motion, Dube explains.
That way, your muscles can contract-and-relax through a full range of motion—versus a partial ROM because they’re already a bit contracted to begin with, Dube says.
Find a foam roller for your client
You have two main features to consider: size and density.
Size - A standard foam roller is about 5 to 6 inches in diameter—or roughly the size of a small side plate, Dube says.
“That’s standard for a reason,” Dube says. It can handle larger muscles, like the quads, traps, hamstrings, and pecs.
For length, 1 to 2 feet is long enough to get the job done and small enough to fit in a gym bag.
Note: Other smaller massage-therapy tools (massage ball, roller stick) can be good for specific applications. But to prep larger muscles for a workout, most clients should start with a foam roller, Dube says.
Density - Foam rollers come in a range of densities, from soft to firm and everything in between.
The density you choose depends on the client.
For beginners, older adults, or clients with pain or injury, err on the side of lower density, Dube advises.
Athletes or clients with very tense muscles may need a firmer density to get a good massage.
The original TriggerPoint Grid foam roller ($35) is medium-firm and high quality. The grid design is meant to mimic the palm, fingers, and thumb of a massage therapist’s hands, Dube says. The channels between panels allow fluid to move more easily, while the broad surface areas compress the soft tissue.
For clients looking for a softer touch, consider the Gaiam Restore Muscle Massage Therapy foam roller ($30).
Tip: To reduce the intensity of any roller, have your client wrap a towel around it, Dube says.
Add a foam roller to your programs
Include foam rolling in the warmup—roll one or two key muscles that the client will use during the workout, for a minute or two per muscle, Dube says.
You can also foam-roll to aid recovery after a workout, hitting the same muscles but moving more slowly over the middle/larger part of the muscle. This helps circulation, moving lactate and metabolic wastes out of the muscle, Dube says—i.e., “milking the muscle.”
Bonus: A foam roller can double as a prop for some exercises, Dube says—“to create a bit more instability or close the kinetic chain.”
For example, during a dead bug, you can squeeze the foam roller between your knees, creating adduction.
Or add an abdominal crunch to planks: Have your client rest their shins on the foam roller and pull their knees toward their chest.
During a pushup, have your client rest their hands on the foam roller to challenge stability.
Here are five more exercises you can do with a foam roller:
Foam-rolling tips to give your client
Tell clients to keep the intensity level at a four on a 1-to-10 scale, Dube says.
More pain or pressure is not better, Dube notes. Remember, foam rolling should be parasympathetic.
If you go too hard too long, you’ll signal to the brain that something’s wrong—and may actually increase tone.
Likewise, holding your breath or foam rolling in a bad position can also trigger an increase in tone. Remind your clients to breathe and maintain good posture (neutral spine, head down, shoulders back).
Total-body training
2. Suspension trainer
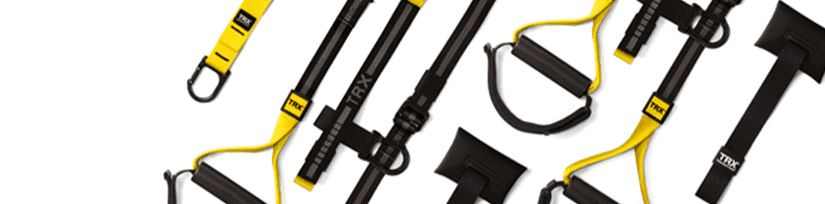
A suspension trainer (like TRX) lets your client do countless moves to improve strength, cardiovascular fitness, balance, coordination, mobility—basically, everything.
And because you can easily progress and regress moves, it’s suitable for just about anyone.
“I’ve trained a six-year-old on TRX; I’ve trained a 92-year-old on TRX,” says Dube, also a master instructor for TRX. “I’ve used it for high-level athletes, in group, one-on-one … Literally, I would use it for anybody.”
The fundamental principle behind suspension training: It displaces your center of gravity, Dube says.
When your center of gravity isn’t lined up, your body must use strength, balance, and coordination to control it.
“It’s increasing core activation just by the nature of the tool,” Dube says.
“If you pressed me and said, ‘Logan, you can only train with one tool for the rest of your life,’ I’d say TRX,” Dube says.
Maybe the one thing you can’t do with a suspension trainer is maximum strength work, though you can always throw on a weighted vest, Dube suggests.
Find a suspension trainer for your client
The most popular suspension trainer is, of course, the iconic TRX, which stands for “total resistance exercise.”
For most clients, the TRX Home2 System is the way to go—you get the suspension trainer plus a door anchor and a suspension anchor (which you can loop around a tree, pole, or fence) for about $200.
Other brands offer less pricey suspension trainers, though we can’t vouch for quality.
Add suspension training to your programs
First things first: Before you instruct your clients to use a suspension trainer, educate yourself.
TRX offers courses for trainers (yes, they count toward your CECs).
A TRX is one of the best modalities a trainer can get certified in, Dube says. “It’s a very popular and effective tool, and many clients expect their trainer to know how to coach them on it.”
Tip: Want to learn 100 TRX moves in roughly half an hour? Check out Dube’s TRX Library playlist on YouTube.
A good first TRX move to teach your clients: a bodyweight squat, Dube recommends.
They can lean back slightly, helping them squat with their chest more upright, so they can activate their quads more and keep their spine in a better position.
As your client squats better, you can easily progress the move. For example, have your client face away from the anchor and lean forward.
Other classic beginner moves:
- Chest press
- Row
- Reverse lunge
- Side lunge
Tip: Wait until the client is more familiar with the tool before trying riskier moves that require them to put their feet in the straps.
Suspension trainer tips for your clients
Give your client a heads-up that learning TRX takes time.
“The first time I brought a TRX out on the floor to show a client,” Dube says, “no joke, she was like, ‘Why are you bringing a sex toy on the gym floor?’”
The point: It’s not intuitive.
You can refer your client to free resources like the TRX YouTube channel, which has helpful beginner playlists like Back to Basics and TRX At Home.
TRX also offers live and on-demand classes—free for the first seven days, and $20 per month after that.
Tip: Remind your client to pay attention to good posture, Dube says. Because moves occur in free space—there’s no machine to guide your body position—poor posture can be easy to slip into.
Resistance training
3. Resistance bands

For clients who need more resistance than bodyweight alone, resistance bands are a more affordable (and more portable) alternative to weights.
“Resistance bands are the first thing I get my clients to buy,” says Karina Inkster, author of Resistance Band Workouts.
They’re also great for clients with larger bodies, injuries, or joint issues.
“Folks with larger bodies who are new to training are starting with more resistance than folks with smaller bodies,” Inkster says. Bands help you adjust that resistance.
They’re also perfect for delivering just the right amount of resistance a client needs when recovering from injury, Inkster says. “Rather than dumbbells or cable machines that typically increase in five-pound increments, resistance bands have infinite small adjustments available.”
Clients with joint challenges like arthritis may find resistance-band handles easier to grip than dumbbells or barbells—or they can use mini bands (with no handles) to add resistance to lower-body moves, Inkster says.
Find resistance bands for your client
There are three types of resistance bands, listed here in order of priority:
- Exercise tubing with handles
- Mini bands
- Assisted-pullup bands (a.k.a. super bands)
Let’s take a look at each.
- Exercise tubing with handles: You can get a full-body workout with these, though they’re especially useful for upper-body training—including hard-to-train-at-home back muscles (rhomboids, lats).
Look for a set with four or five resistance levels—Inkster recommends this set from Tribe Fitness ($22), which comes with a door anchor (a must, says Inkster).
- Mini bands: Shorter, wider loops can be placed around ankles or above the knees, great for lower-body workouts.
For hip and glute training, spring for higher-quality fabric bands, like Nick Tumminello’s NT Loop ($30 for a set of three), which tend to be stronger and longer-lasting.
For range-of-motion exercises (e.g., clamshell on your side), latex may be the way to go, Inkster says. This five-band set ($12) has over 90,000 reviews on Amazon.
- Assisted-pullup bands: These “giant rubber bands”—a continuous loop like the mini band, but big—can help your higher-level clients learn advanced moves (pullup, pistol squat) or practice speed work with assisted sprints (see below).
Dr. John Rusin’s Official Resistance Bands ($85 for a set of eight) are high quality, says Dube.
Add resistance bands to your programs
With tubing with handles, a great first move to teach your client is a classic standing row with the band anchored to a door at chest height.
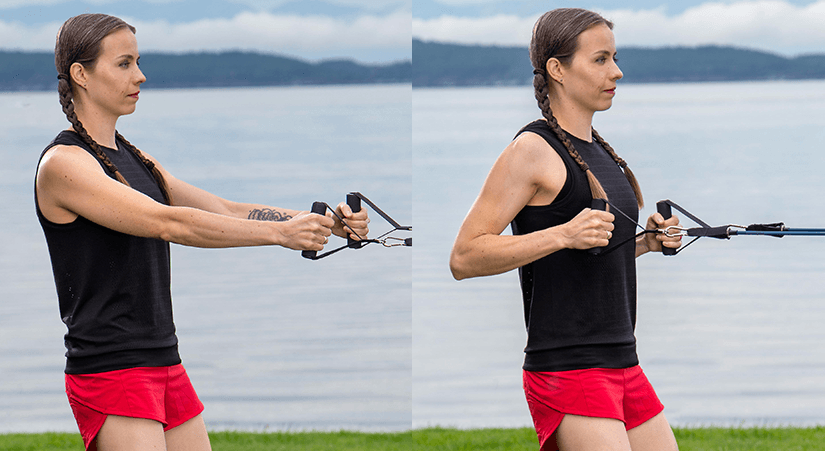
Typically the resistance band is anchored at chest height—Karina Inkster demonstrates the classic row. Photographs by John C. Watson.
“The back is the hardest to train when you don’t have much equipment,” says Inkster.
For mini bands, start with a glute bridge with the band above the knees.
Again, keep tension in the band throughout the move, Inkster says. “The band wants to pull your knees toward each other, and you’re using your glutes to keep your knees apart.”
For assisted-pullup bands, anchor the band to a pullup bar (if your client has one) and have them slip one or both knees inside the loop to practice pullups. Or they can place one leg through the loop to practice pistol squats.
For clients who want high-level conditioning, try assisted sprints. You (or a workout buddy) would hold one end of the band while the client tries to sprint as fast as they can.
Resistance band tips for your clients
Tell your client to start every move with the band taut. “Tension increases as you do the move,” says Inkster. This advice goes for just about every band move, with any type of band.
Lower-body conditioning
4. Jump rope
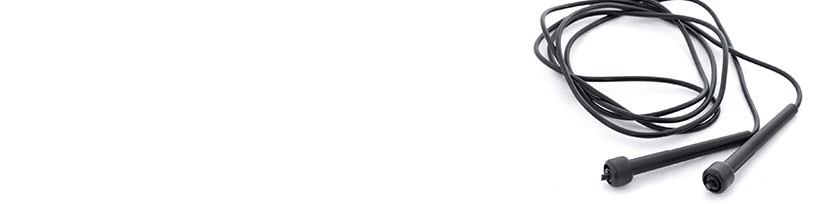
A jump rope is ideal for clients who want cardiovascular training with less impact than running, Inkster says.
But avoid it for women with pelvic floor issues and adults with joint problems like arthritis.
Find a jump rope for your client
Jump ropes come in countless varieties, but they fall into three main groups:
- Basic/beginner
- Speed
- Weighted
For a beginner, a basic jump rope (like the adjustable EliteSRS Beginner jump rope, $17.50) is all you need.
For more advanced clients, you can move on to a speed rope, says Inkster—which is lighter-weight so it can go faster. And the next step up after that would be a one-pound weighted rope (extremely challenging).
Feel like splurging? Consider a Crossrope, which lets you swap out the handles to try different rope types and weights.
The Crossrope Get Lean set ($100) comes with quarter-pound and half-pound jump ropes.
(And if your client is really into jump rope, add the jump rope mat to your order for $99; it helps reduce joint impact and keeps the rope lasting longer, Inkster says.)
Tip: Unless you’re going with an adjustable jump rope, make sure you know your client’s height before ordering!
Add jump rope to your programs
Jump rope is great as a warmup or finisher, says Inkster.
As a full-body exercise, it warms up your whole body. And because it can jack up your heart rate quickly, it’s ideal for a short “burnout” at the end of a workout, Inkster says.
- For beginners: Try two 1-minute sets for a warmup, and three 1-minute sets as a finisher.
- For advanced clients: Do two 2-minute sets for a warmup, and one 4-minute set as a finisher.
Note that if your client is using a one-pound weighted rope, these times may need to be cut in half, Inkster says.
For newbies who are still getting comfortable with the rope, try this warmup: Have them set a timer for five minutes and practice, Inkster suggests. “Even if you mess up every third jump, you’re still getting a good workout.”
Another idea: Use jump rope for the cardio component of a circuit workout (great for clients training for endurance events).
Jump rope tips to give your clients
Three common mistakes that people make with the jump rope:
1. They jump too high. Coach them to jump just a centimeter off the ground. Inkster uses the cue “ninja feet”—meaning, jump as quietly as possible.
2. They add a mini hop between jumps. To fix it, have your client hold both jump rope handles in one hand and turn the rope next to them, jumping right after they hear the rope touch the ground. “You won’t have to worry about jumping over the rope; you’re just focusing on timing,” Inkster says.
3. They use their whole arm—when really, the wrist should control the move. Inkster uses this cue: “Pretend you’re holding a pencil between each armpit and your torso.” That way, your upper arms don’t flare out.
Tip: Have clients film themselves jump-roping or jump-rope in front of a mirror so they can see their form, Inkster suggests.
Upper-body conditioning
5. Battle ropes / Inertia Wave

Both battle ropes and the Inertia Wave (kind of like elastic battle ropes) are intuitive tools that most people can quickly figure out how to use.
They seem similar, but the physics work differently.
Because battle ropes have no elasticity, the force you put into them is the force you get out of them, says Aaron Guyett, battle ropes master coach and education director for Living.Fit.
The Inertia Wave, on the other hand, is elastic and generates its own inertia.
“Basic analogy: When you drop a pebble in the water, you see the water ripple out,” says Dube. You start with small movements to get the tubes going, and then use the whole body to manage the speed and momentum.
“All the ‘ripples’ demand a lot of energy from the muscles to maintain posture and generate movement—and to resist the movement and energy that the tubes throw back at you.”
To get the benefits of the Inertia Wave requires a bit of setup: The tubes must be 2 to 3 feet apart and at least 2 feet off the ground, and they should be taut but not so tense that they pull you forward.
By comparison, battle ropes are less finicky to set up, though they’re also heavier and more difficult to travel with.
Both are suitable for beginners, though battle ropes can get progressively harder, Guyett says.
Another factor: The Inertia Wave may be less intimidating for some clients.
Either can be a good option for clients who want conditioning but prefer upper-body training over leg day.
Find the right rope for your client
Guyett hand-selected the battle ropes sold by Living.Fit by Kettlebell Kings ($139-$249) after months of research, so obviously he recommends those!
But whatever brand you go with, a few tips:
For use on any surface (including outdoors), look for canvas-covered battle ropes, which are less likely to fray.
For use on a smooth surface (concrete floor, basketball court), go with a braided rope, Guyett says.
For clients who travel, the Inertia Wave ($110) is lighter and more portable. (The PTDC founder, Jonathan Goodman, took it with him on a recent trip to Mexico.)
Tip: Want a 10 percent discount on Inertia Wave? Use code theptdc at checkout.
Add battle ropes / Inertia Wave to your programs
Either battle ropes or the Inertia Wave can be used as:
- a warmup
- a finisher
- the cardio component of a circuit
A good first move for battle ropes: alternating waves—moving the ropes in a contralateral pattern, Guyett says.
Start with short controlled movements. “You don’t have to do anything crazy,” Guyett says. “Just make some small waves.” Your client can move on to bigger movements as they get comfortable.
To progress battle ropes, simply take a step forward—or two, three, or five.
Taking a step toward the anchor means you’ll have more slack in the rope and need more tension to complete the move, says Guyett. “It’s like putting another plate on the barbell.”
The Inertia Wave has a movement system with seven basic methods of use.
Start with the eponymous Inertia Wave method—moving both tubes quickly up and down simultaneously.
To progress the Inertia Wave, you can simply go longer or harder.
Battle rope tips to give your client
The biggest mistake most people make with battle ropes:
They start too far back (creating too much tension in the rope)—which leads to too much grip and poor, forward-leaning posture.
Tell clients to start with tension in the rope and then take one or two steps forward, Guyett says. Keep the torso upright, shoulders back.
Inertia Wave tips to give your client
You want to start with the tubes pulled taut, says Dube—but not so tight that they pull you forward.
Tell your client if they feel like they’re being pulled forward, to step forward a few inches.
As with battle ropes, good posture is key: Maintain a strong athletic stance, feet about a foot apart, knees slightly bent, chest up. Then have at it.