
Not too long ago I wrote a detailed article called Why You Should Train Clients Online and How to Get Started. While predominantly about the opportunity for trainers to make $1,000s if not 10s of thousands more each month by starting and systemizing an online training business, it also hit on the need for in-gym trainers and gyms to leverage powerful software to help manage their clients and automate much of their business.
After countless meetings and a lot of testing I decided to recommend Trainerize (go to www.theptdc.com/trainerize for a free 30-day trial) to manage your clients, build your programs, and automate your business.
You responded with a lot of excitement and enthusiasm and 100s of you have already signed up for the free trial and are closer than ever to finally scaling your personal training efforts to reach more people and make more money.
One question that has come up repeatedly in the first day since that article was released was about exercise videos. Trainerize currently has a bank of 200 videos and is adding more, but I want to address the question and teach you the secrets to YouTube for personal trainers.
Why You Should Film Your Own Videos
People buy trainers, not training. Even online personal training with clients around the world is personal. Any reasonably technologically savvy person nowadays knows that they can click online and find an exercise demonstration on YouTube but clients are buying services from you, so you should be the one demonstrating.
In fact, I received an email from somebody yesterday telling me that a different software was better because they provided videos of 20,000+ exercise demonstrations.
20,000!
How many exercises do you teach to your clients? 20? 30? Maybe a few more.
I'm not impressed by volume, I'm impressed by quality. Information overload is already an issue.
One of the reasons why I liked Trainerize so much was the ability to seamlessly connect your personal YouTube channel with your account. Once done, you can drag a video file into an exercise description and click save -- that exercise now has your personal demonstration. With one click, a client can watch the video from their phone while training.
You can even add your own exercises, write your own descriptions, drag your own video into it and save it into an existing template (this takes all of 5 minutes) and it's there for life.
But that's not all. In this article I'll reveal to you my double-pronged approach. You will learn the secrets to YouTube SEO and double your efforts by uploading the same video to Trainerize.
The Secret to YouTube SEO For Personal Trainers
If you want to go all out, hire a professional team, get graphics designed, and create top-quality videos, all the power to you. Most trainers don't. For the majority, I suggest my simple double-pronged approach.
Step 1 - Write a list of all the exercises you include in your programs. At most, there will probably be 40.
Step 2 - Take a day and enlist the help of a friend. With a smart phone or handycam, film a 20-30s video for each exercise. A 5s spoken description and 2-4 reps of the exercise.
(Pro Tip: Buying a Mic kit from your local electronics store makes a huge difference in sound quality and might be worth the $150 investment.)
Step 3 - Upload all videos to YouTube (create a free account if needed).
Step 4 - Write as the title of the video in a form similar to "YOURCITY Personal Trainer -- EXERCISE_NAME"
What many people don't know is that the entire description in YouTube videos is indexed by Google. This means that you should use as many of these keywords as possible in the description of your YouTube videos. Before that description, include a link back to your website or Trainerize site.
This way people searching from your city for advice related to your video will come across you as Google identifies a users IP address and location and gives them results largely based on location.
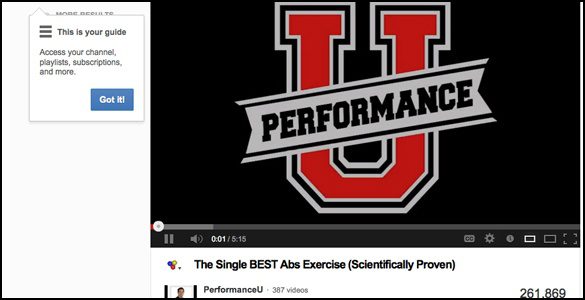
Here's an example of a video of Dan Trink where I followed this system to write the description (note: You might have to click through to YouTube to read the description):
Step 6 - Double up the usage of the same video by linking it directly with an exercise in your Trainerize account. Here are the exact steps:
Select "exercise library" from the top left menu.
In the left column, select "own custom exercise".
Click the "new" button in the top left of your window and you will see the screen below. Here you can write a title, description, and tag it to easily drag and drop it later. To connect the exercise with your YouTube video, just enter the link of your video below.
It's as easy as that. Now your new exercise with custom video is saved in the database. You can create saved workout templates and have minor adjustments for new clients or drag this new exercise into any new program in seconds without having to rewrite the description ever again.
Note: Since originally publishing this article the Trainerize interface has changed. They have improved their system considerably but the same functionality that I describe here is available.
Step 7 - I suggest you take the time one day to film and enter in all exercises you use. Then, if you decide to add a new exercise from time to time, you do so, but the bulk of your work is already done.
This is Your Kick in the Butt
It's never been easier to get started. Go to www.theptdc.com/trainerize right now and sign up for a free 30-day trial. Film your exercises, upload to YouTube and use my double-prong system to have a dual effect. Message you friends and family and offer them a cheaper personal training option online.
By the time your 30-day trial is over you should already be making an extra $1,000 or much more a month and all of your systems should be developed. From there, the software is a tiny investment compared to the return.
Oh, and one more thing -- It only takes one to make a viral video. You never know what will happen once you start uploading.