

The following is a guest post from Martin Rittenberry based in Minnesota. He's developed a powerful system for building an exercise library that will improve both your online and in-person business.
"Hey! This is John at Dynamite Training Studios here to teach you..." 12:31 video length, no thank you.
Click.
"Hey! This is Scott with Scott Fitness and I'm here to teach you... " Wait, why doesn't he have a shirt on?
Click.
"Mark here with UltimateFatLossTrainingandSolutions.com..." Great, a competing online business - and no shirt.
Click.
Why can't anyone just demonstrate a reverse lunge?!
Rushing out the door for your next session while trying to send an online client a quick refresher on the difference between a split squat and lunge is frustrating when some trainers take it upon themselves to demonstrate an exercise alongside a 12 minute (half-naked) monologue.
Everyone has different personalities, needs, goals, and experience levels. Managing in-person and online clients together can be really tough. But it doesn't have to be. Systems, like managing your clients' programming, are crucial not only from a time management perspective, but they also allow us to be more effective and help more people.
If you're programming workouts for in-person clients to do outside of their sessions with you or starting to grow your online business, you've likely been asked a time or two over email: "what is exercise "X" again?" Unless you keep a master Word or Excel document of different URL links (and have your jump drive on you at all times), finding the perfect video on YouTube or Vimeo in under a minute can be nearly impossible.
So what should you do? Record your own. And I'll show you how.
People buy trainers, not training"”recording your own videos to send to clients adds an extra touch that differentiates you from your competitors.
While recording a massive exercise library can be time consuming on the front-end, with the power of the Internet you can store hundreds of exercise videos exactly how you want them at zero cost. All you need is a computer, Internet connection (you have those two if you're reading this), a cheap USB camcorder and a Saturday afternoon.
I personally used a Flip HD for a majority of my demo videos. What about a tripod? With enough creativity or a close friend, you don't even need to spend money on one. To record my first batch of videos, I balanced my USB camcorder on jump boxes and weight plates.
Have a system to record everything you want.
My first step was to modify a master exercise database I created on Excel. Years ago, I found myself actually forgetting favorite exercises so I realized I needed a system to organize my thoughts on exercise regressions and progressions. To keep things simple and effective, I created a giant Excel document with sheets labeled: corrective, core, power, knee dominant, hip dominant, upper body push, and upper body pull. To organize my thoughts further, I broke down patterns within each sheet.
I definitely suggest keeping it simple if you're just starting out and limit your categories to core, lower body, and upper body. As you advance, you can easily edit your database to suit your needs. Keep a soft copy of the database and add to it when you come across a new movement or are experimenting in the weight room.
Camera... check! List... check! Time...?
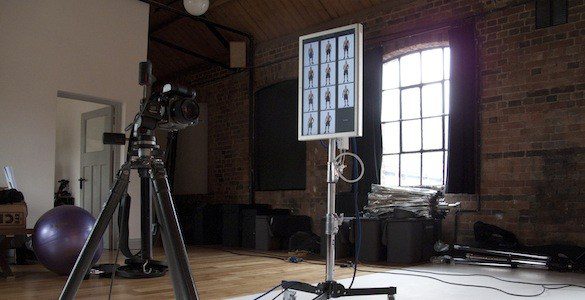
After securing your equipment and exercise list, the next step is to find the time. I started the first batch of videos I made awhile back when it rained on a Saturday afternoon after training my morning clients. My gym is normally dead after lunchtime on the weekends (people walking through the shotis no good) and the crappy weather (seen below) made it enjoyable to get something productive done away from the computer.
It sucked taking the time to shoot these videos. But, when it was done, it felt great! Be creative with your time. Use rainy weekends, 30 minutes after your shift each night, or just keep your camera and tripod on you for a few weeks so you can set up shop whenever you have spare time or a client cancels.
Done recording... now what?
Alright, you've got dozens of clips recorded. What's the best way to get them to the Internet for your clients? Thankfully, there are several cost-effective software options out there and some USB camcorders even come with preloaded editing software.
For me, a Saturday afternoon with my Macbook Pro, coffee, and good tunes made the process rather painless. To edit the videos, I used QuickTime and the trim feature. I became even more efficient by performing several exercises within one clip (without pressing stop on the record button) and was able trim each exercise out without altering the original file. This saved a TON of time on the editing portion. Only ten recorded clips turned into over 40 actual exercise clips after the trimming process.
Side note: One afternoon I recorded over 40 exercises in about an hour despite a few members working out in the studio at the same time. Yes, there is some background noise because of it, but what matters most is the fact I got over 40 exercises recorded and edited in a short afternoon. Save some of your perfectionism for longer coaching tutorials (with your shirt on).
Recorded, edited, time to import.
Since Google currently runs 80-90% of my life and business, I decided to stay with YouTube. Another nice benefit of using YouTube? Trainerize offers the ability for trainers to upload their entire YouTube channel making it easy for online clients to find videos in only a few clicks.
Again, QuickTime made my life much easier for the actual importing. With QuickTime and my own internet (coffee shops don't like it when you suck up their bandwidth), I could directly export each exercise clip to YouTube with the built-in share function. No Mac? YouTube makes importing videos easy with their web-based platform if you need to go that route.
Like coaching in real-time, keep the cues in the description short and succinct. When you're uploading several clips all at once, you don't need to write a dissertation on foot and hand position. Many clients won't read them or will forget the cues when they're in the gym.
If you're using Trainerize you'll have another opportunity to write out your description for each uploaded exercise that gets shown right on their program. If you're hand-typing or using another system, I suggest writing a few cues directly on the program to jog their memory.
If you want to get an idea of what simple channel looks like with different clips and descriptions, check out mine here: http://www.youtube.com/user/mritty85
10% = Blown Away
I won't lie to you and say you can have a full exercise library in 20 minutes. The reality is a 15 second clip will take you around 3-5 minutes of real time to set-up, record, edit, and upload onto YouTube. But that's one clip. Like the math involved for batch cooking meals (it takes the same amount of time to cook six chicken breasts as only one), the total time to finalize and upload 10 clips doesn't take any longer when you have systems in place.
If you're willing to go the extra 10% to do the best for your clients, I challenge you to add this system into your toolbox. By doing so, you'll set yourself far apart and impress your offline and online clients more than you can ever imagine.
While the internet is riddled with thousands of trainers explaining killer chest workouts with their shirts off, you can invest a little effort and save yourself time and headaches by doing these simple steps. By doing so, you will give an even better product for your clients and they'll rave about you to their friends. Did anyone say referrals?
All this while keeping your shirt on.
Click here to download an Excel example of Martin's exercise database.